
February 20, 2017
How often do you find yourself working on a proposal, with Word, Outlook, and a couple of file explorer windows open, and then you have to change gear to work on another urgent project? You close all the windows, and start on the new project, only to have to reopen them when you’re done.
Using Windows virtual desktops, you can leave the windows open, switch to a new virtual desktop, and switch back to the original desktop at the end!
To create a new virtual desktop, click Task View, ![]() , on your taskbar, or press the Windows key,
, on your taskbar, or press the Windows key,  , and Tab together (+Tab), and then click + New Desktop at the bottom right of your screen (or press Ctrl++D to do both steps):

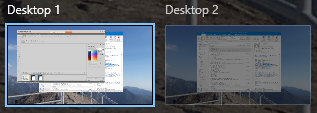
You can now open the programs and file explorer windows to do your new task. To switch between desktops, click Task View, ![]() , or press +Tab, and then click on the desktop you want to use. You can also press Ctrl++left arrow or Ctrl++right arrow:
, or press +Tab, and then click on the desktop you want to use. You can also press Ctrl++left arrow or Ctrl++right arrow:
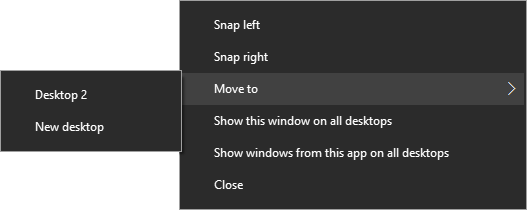
To move a window between virtual desktops, click Task View, ![]() , or press +Tab, and then click and drag the selected window to the destination desktop. Alternatively, right click on the selected window, click Move to, and then select the destination desktop:
, or press +Tab, and then click and drag the selected window to the destination desktop. Alternatively, right click on the selected window, click Move to, and then select the destination desktop:
To have a window on all desktops, e.g. Outlook, click Task View, ![]() , or press +Tab, right click on the selected windows, and then click Show this windows on all desktops.
, or press +Tab, right click on the selected windows, and then click Show this windows on all desktops.
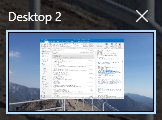
To delete a virtual desktop, click Task View, ![]() , or press +Tab, and then click ✖ at the top right of the desktop:
, or press +Tab, and then click ✖ at the top right of the desktop:
 |
“Wordman’s Word Tips” is sponsored by SMA. Wordman is Dick Eassom, CF APMP Fellow, SMA’s Vice President for Corporate Support. Wordman has been providing advanced Microsoft Word help and training, and custom templates, to proposal professionals for over 20 years. |


